Baby hats

I guess I’ve been remiss in posting in this blog with any regularity. The latest excitement is that I’m pregnant! 27 weeks now. This is me last week:

I’m getting to the point where sitting — and being on the laptop — is pretty uncomfortable. I’m really bored of lying around reading facebook so I’ve started getting crafty again. My first baby craft project was a couple of simple little jersey hats. Super easy project! These each only take me an hour or so, and I’m a sloooooow sewist.

I got the tutorial from the Spoonflower blog.

The first hat I made has a little dino on it. Aww.

As a nod to my husband’s request to “a hat with fire on it”, I made one with the Interpretive Arson flame on it. (IA is a fire art group my husband, and to a lesser extent I, have been a part of for closing in on a decade now.) I might go back and replace the center of the flame with yellow jersey instead of orange, since I had a chance to pick some up at Stone Mountain last weekend.

Lastly, one important lesson I learned was that cats do not make very good baby hat models.

Succulent arrangement housewarming gift

I was invited to my cousin’s housewarming party weeks ago, but it wasn’t until the very last minute that the perfect housewarming gift occurred to me: a succulent arrangement! I hustled over to Flora Grubb, which is only about a 5 minute drive from my house. Unfortunately, due to dwindling daylight, they had already closed! Fortunately, the nice folks working the shop gave me a few minutes to pick out a pot and some plants – they even helped me pick plants that would be happy together! (Though I got a string of pearls, despite their warnings that it likes less sun than the rest of the plants I picked.)

Before
Planning the arrangement

Top row, L-R:
Spikey green plant: Aloe Hellskloof Bells (Brian Kemble hybrid)
Little white plant: An echeveria of some sort, I think
Fat purple plant: Pachyphytum “Blue Haze”
Fuzzy purple & green plant: Sempervivum “Plum Fuzzy” (so cute!)

Second row L-R:
Purple/pink thinner leaves: Echeveria “Afterglow”
Flat round green lives: a kalanchoe of some sort
Dark purple: dwarf sempervivum

Bottom row L-R:
Sedum of some sort
Pinkish bluish purplish fat leaves: Pachyveria “Blue Pearl”
Yellow: another sedum
Senecio Rowleyanus (varigated string of pearls)

After
Assembled!

I finished it off with some “rainbow rock” that I had lying around from an earlier adventure at Cactus Jungle.

Untitled

My cousin really liked the arrangement! I was happy to give him something for his new yard.

Untitled

Untitled
I love the contrast between these two. I hope the yellow sedum spreads out!

Untitled

Untitled
Plum Fuzzy is so cute!

Untitled
The kalanchoe in the back is supposed to get pretty big!

Mini Rock Garden and other fun gardening adventures

Well, obviously I haven’t been sewing or crafting much lately. After my last post I fell headlong into the house buying process, and since then my life has been filled with inspections, mortgage approval, moving, Burning Man, decorating, and other general homeownership projects. It’s been a lot of fun!

For the first time, we have outdoor space: a yard, a patio, and a front stoop! All of these are screaming to be filled with plants and other beautiful objects, so I’ve been starting to get into gardening. I’m still a very hands-off (read: lazy) kind of gardener. Fortunately my favorite plants have always been cacti and succulents. This weekend we were invited to join our friends Mike and Christina on a bike ride to the plant sale at the Botanical Gardens in Golden Gate Park. It was a gorgeous day so how could we say no? I ended up buying a succulent (Sedum spathulafolium “Cape Blanco”), which kind of completely fell apart on the bike ride home, a lovely, spikey, purple dyckia, and three alpine rock garden plants.

Here’s the dyckia:

Spikey

It might look better in an orange or blue pot to offset its purple color, but for now I’m enjoying the subtle monochromatic look of this planting.

I had never heard of alpine rock garden plants before, but I loved how they looked. Tight, tiny clusters of rosettes, hard to the touch; very textural and detailed. I decided to buy a few and make a rock garden.

The Botanical Gardens didn’t have any pots or soil for sale, so we decided to make a trek east to my favorite nursery, Cactus Jungle. We bought our wedding centerpiece and favor succulents there a few years back. The staff was awesome about planting them and housing them for a couple months while they grew in. They’re always really helpful and knowledgable, and the variety of plants they keep in stock is always beautiful fun to peruse. Hap (one of the co-owners, I believe) helped me pick a sedum and some sempervivums that would work well with the alpine rock plants I’d gotten. I chose a square fiberclay pot that looks like cement (but is much lighter weight!) to put them in, and rainbow rocks for mulch. Here’s the result:

Rock plant pot

I’m really happy with how it turned out! I can’t wait to see how it grows in. My only concern is that it’s not going to get enough light in our little patio or shaded backyard. I’m afraid to put it on our front porch, which is south-facing and gets sun all day, because it’s so imminently stealable. I guess I’ll just keep an eye on it to make sure it’s not dying and move it if it starts looking unhappy.

Rock garden

  • Top left: Sempervivum arachnoidium
  • Top center: Saxifraga cochlearis minor
  • Top right: Sempervivum (I didn’t note the particular type)
  • Middle left: Sempervivum (another that I didn’t make note of)
  • Middle right: Saxifraga winifred bevington
  • Bottom left: Sedum ogon
  • Bottom right: Raoulia lutescens

Comfiest Skirt Ever

When I was in Australia last year, I found a pair of incredibly comfortable pants at a great little shop called Tantrika in Kuranda. They were basically pajamas: super wide leg woven fabric, with a long fold-over waistband. They are extremely comfortable and I love how they look, but I couldn’t shake the fact that they reminded me of pajamas. I could never wear them to work, and they are completely impractical for biking. I decided to take matters into my own hands and, using their basic design, construct a skirt. I picked up some fun fabrics in my favorite colors et voilà!


Dailywear, 4/5/13

The comfiest skirt ever.

Skirt!

The first iteration needed a bit of help. The fabric I chose for the waistband had a lot of stretch and not much recovery. While the skirt stayed up, by the end of the day it had gotten incredibly baggy. I needed to decrease the circumference of the waistband — at least for this fabric.

For the second iteration I went a little nuts and re-drafted the pattern as culottes. I have a strange compulsion where I can’t stand not having fabric between my legs. This means I always wind up wearing leggings with skirts and dresses. Fortunately I live in San Francisco! But I wanted to construct something that would look like a skirt that I wouldn’t have to wear leggings with.

Dailywear, 4/8/13

This one, with a narrower waistband, was much better in terms of bagginess. It still was a bit baggy by the end of the day. I might have to admit that this fabric isn’t doing the job I wanted it to! Still, it does hold the garment up, and that’s the point, right?

The third iteration was another skirt, but this time I added pockets. What good is a garment without pockets??

Handmade skirt

Here are some photos of the third skirt that will give you some idea of the construction of these skirts/culottes:

Handmade skirt

Handmade skirt

Pretty simple! All told, they only take about an hour to construct. The most annoying part is attaching the waistband to the skirt. I ended up settling on a technique where I pinned it in four equally spaced places, and then stretched the waistband to match the width of the skirt as I sewed.

I still have some more fabric that I bought for another pair of culottes. It’s lovely blue pinstriped linen, and a buttery bamboo rayon for the waistband. I’m hoping it’ll bag less than the cotton jersey I chose for the others!

Fabric for another skirt

Fingerless gloves, a long time coming

About four and a half years ago, I started working on a pair of fingerless gloves. Last month, I finally finished them.

Fingerless gloves, FINALLY

No one’s ever accused me of being good at follow-through.

I began this project during a sweltering road trip through the Southwest. What inspired me to get elbow deep in wool in 100F+ temps is beyond me. I had a vision! And I was right. I love them! They’re made with my favorite yarn, Berroco Jasper, a delicious single-ply merino that used to come in some amazing colors. It’s self-striping yarn, and I picked a deep teal/ocean blue and a raspberry to work with. I decided to use the pattern “Knucks“, from Knitty. I wanted the fingers and cuff to be a little longer than the pattern called for. I like the result, though I wish I’d made the pinkies slightly shorter.

Overall I found the pattern solid and easy to work with, but it required quite a bit of tweaking to work with the gauge that resulted from the yarn/needle combination that I’d chosen. I made the child-sized gloves (and admittedly my hands are tiny) and they were still baggy. I tweaked the thumb gusset to be more severe and voila! A perfectly fitting glove.

So why did it take me nearly 5 years to finish them? Well, the thought of frogging the first sad, saggy glove was just too daunting for some reason. So it sat, and sat, and sat, and moved with me from one apartment to the next, to the next, and still another. Then finally last September some friends offered to host a craft party and I decided, this was it. Today was the day. I would finish these damn gloves for once and for all.

Good way to spend a day

Keeping with the theme of these gloves, it happened to be an unbearably hot Sunday afternoon, but the mimosa kept me cool enough to finish knitting the glove. After all that, it only ended up taking me about 2 hours to finish! But I still had the ends to weave in. It took me another 3 months to finally get around to completing that dreaded task. But now it’s done, done, done and I can brag about it on the internet!

A dress for Ed

I bought a dress for myself but quickly learned that it looked far better on my tall, slender husband than it did on my short stocky peasant body. The only problem? Its bright greens and pinks did not suit him one bit. I set out to copy the dress in a more subdued and Ed-appropriate black-with-red-accents color scheme.

The fabric I chose was, like the original dress, a very soft and slightly stretchy woven cotton. The red has a slightly shinier sheen than the black. I found the fabric at (you guessed it) Stone Mountain and Daughter.

Ed
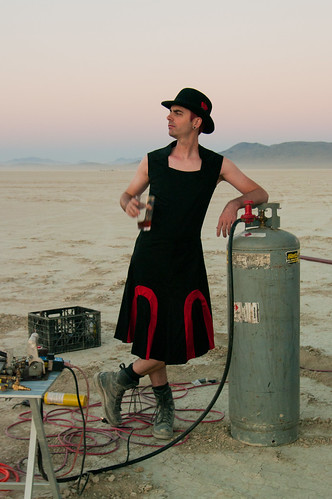
Ed in his natural habitat. Photo by Morley.

This was by far the most ambitious sewing project I’ve undertaken, even more so than Hairy Larvae. Though it looked obvious how the dress had been constructed, once I started drafting a pattern from it it became quickly evident that there was a lot going on! Sewing the pieces together was no small feat, either. There were a lot of curved seams, most onerous of which were the curved godets in the skirt. I have since learned the correct way to sew a curved seam (stay-stitching, notching) thanks to Alice over at heteronormative lovefest, but at the time it drove me crazy trying to get everything lined up without bunching.

Edlite
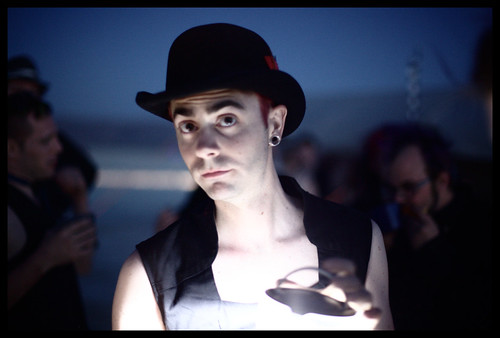
Details in the neckline. Photo by Joachim Pedersen, some rights reserved

In the end, it was worth it. Ed gets a ton of compliments whenever he wears the dress, and I think it looks fabulous on him.

Ed and Heather
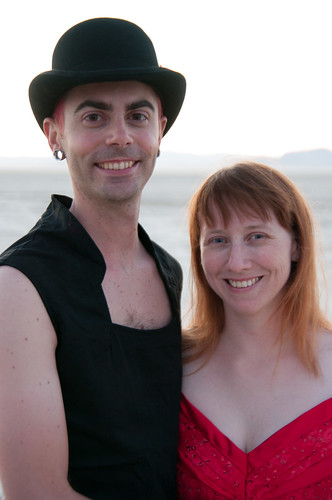
Ed and me. Photo by Neil Girling, some rights reserved

Hairy Larvae

I came up with a terrible Burning Man pun and decided to turn it into a costume. For those non-burners, one of the original founders of Burning Man is named Larry Harvey. “Hairy Larvae” is a spoonerism of his name.

Ok. This is admittedly really stupid, and probably not even original, but how could I possibly resist?! 😀

Hairy Larvae!

Hairy Larvae is made out of grey polarfleece and absurdly soft orange fun fur, both acquired at Stone Mountain and Daughter. This was the first time I worked with fun fur and I was struck by how cutting it felt like butchering a muppet! Hairy also has big buttons for eyes and a bright orange zipper. I used an comfy hoodie I had on hand as a pattern, simply extending the length to make it go to my knees. Unfortunately it turned out just a little tighter than I’d like in the hips, and it would’ve been nicer if I’d lined it… Still, the final product is so ridiculously cozy that I ended up living in it at night on the playa. Hilarious AND practical: the perfect playa clothing.

In pursuit of the perfect playa pant

I have a lot of weird hangups regarding clothes. I don’t like wearing skirts, even though I love the way they look, because my legs rub together and it’s uncomfortable. I don’t like wearing synthetic fabrics. I can’t stand it when clothes ride up and otherwise don’t stay in place. And I really loathe clothes that aren’t comfortable.

At Burning Man, all of these things are amplified by the sun, the heat, and the dust. While most people are out there wearing the zaniest, prettiest garments they can dream up, I dread the act of clothing myself. I can’t stand sunscreen so skimpy clothes are right out, but heavy clothes are also untenable due to the unrelenting heat. Anything itchy or synthetic is a terrible idea, as are things that are tight and un-stretchy (heat rash!). Garments more delicate than a typical cotton t-shirt are going to get destroyed (or at least relegated to playa-only wear). But of course, wearing typical street clothes is BO-RING. What’s a picky gal like me to do?

I aimed to make some pants that were super comfy and protected me from the sun but still looked reasonably good. I used some fold-top pajama pants that I had on hand as a pattern. The fabric is most divine: a wonderfully drapey organic bamboo jersey that I found at Stone Mountain and Daughter. Stone Mountain, by the way, is an amazing sewing resource in Berkeley. Even thought I live in San Francisco, I still make regular pilgrimages across the bay for my Stone Mountain fix.

The most comfy pants ever

Ultimately, I’m not sure I like the way they turned out. They are absolutely the most comfortable pants I’ve ever worn, and are great for wearing in the desert weather… but they are pretty “blah” in terms of the way they look. Turns out when you make a pattern from pajama pants, the result looks like pajama pants! I also don’t feel the final product does the fabric justice.

The most comfy pants ever

Maybe if I add some more interesting details – embroidery? appliques? – and some shaping, and if I finish the bottom hem in a reasonable fashion, they’ll look better. In the meantime they’ve been relegated to wearing on the couch at home while watching movies.

Matching hat and gloves for Ed

Because I loved how my Berroco Jasper/Karabella hat turned out, I made one for (my then-boyfriend, now-husband) Ed. He is fond of blacks and dark greys so the charcoal color I picked out was perfect for him.

Ed's hat

I decided to make matching fingerless gloves for him, since he spends a lot of time outside and is always cold.

Knitted fingerless glove for Ed

The pattern I went with was Dashing from Knitty (by Cheryl Niamath) and the yarn is Berroco Jasper again. It knitted up a little larger than expected. I started making the “larger” size but it was too big so I decreased to the “smaller” size. The finished size came out somewhere between the pattern’s “smaller” and “larger” sizes. They’re maybe a touch big on me, which is perfect for Ed. If I ever make these for myself, I’ll be using the same yarn but smaller needles.

Knitted fingerless glove for Ed

Armwarmers for Ed, finally done